Abbreviations – US terminology
Magic ring
sl st – slip stitch
ch – chain
sc – single crochet (UK: double crochet)
inc – increase by making 2 sc in one stitch
dec – decrease by crocheting 2 sc together – use invisible decrease if you know it
dc – double crochet (UK: treble)
(1 sc, inc) x 6 = means that you repeat the stitches in the parenthesis 6 times
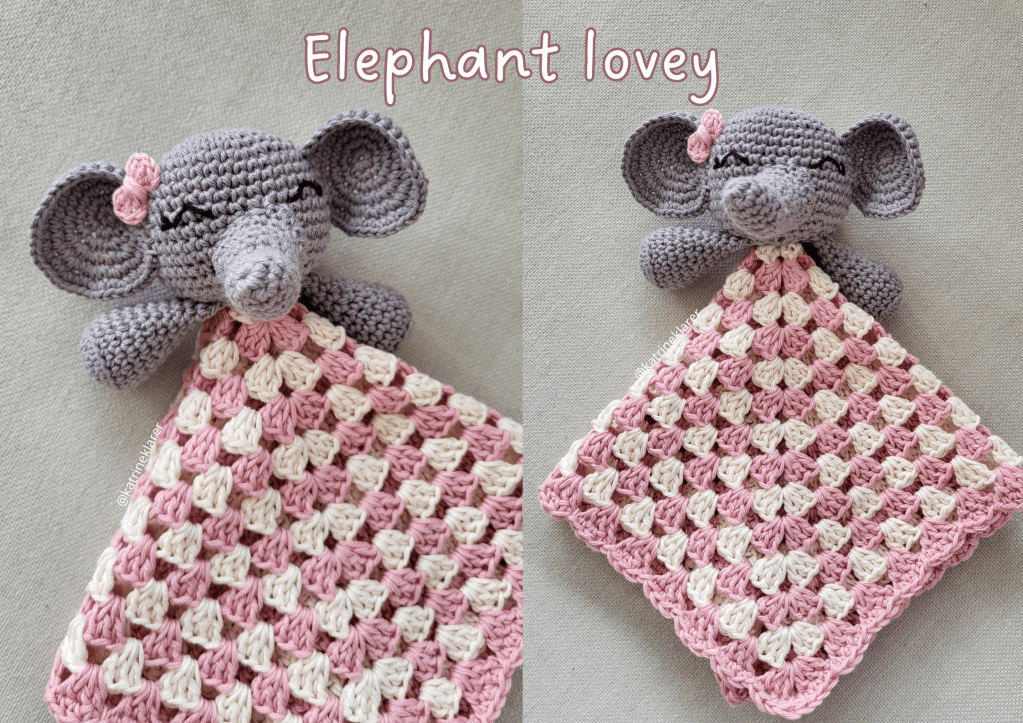
Materials and supplies you will need
- Cotton yarn 8/4 – I’ve used Drops Safran (or you can also use thicker yarn and use the crochet hook needed for this yarn. Your lovey will then become bigger). I recommend cotton yarn so that the baby safely can chew away at the lovey.
- Crochet hook 2 mm or B for the head and arms – or the crochet hook you need for your chosen yarn and crochet style. I recommend using a size smaller than recommended on the yarn label or you need to crochet tightly. This is done to make sure the filling isn’t very visible on the outside and does not push out through loose stitches.
- I used size 3 mm for the blanket.
- Filling (use something that is safe for the baby)
- Sewing needle and pins
- Black embroidery thread to embroider on the eyes and nose. (I embroidered on the eyes instead of safety eyes to make it completly safe)
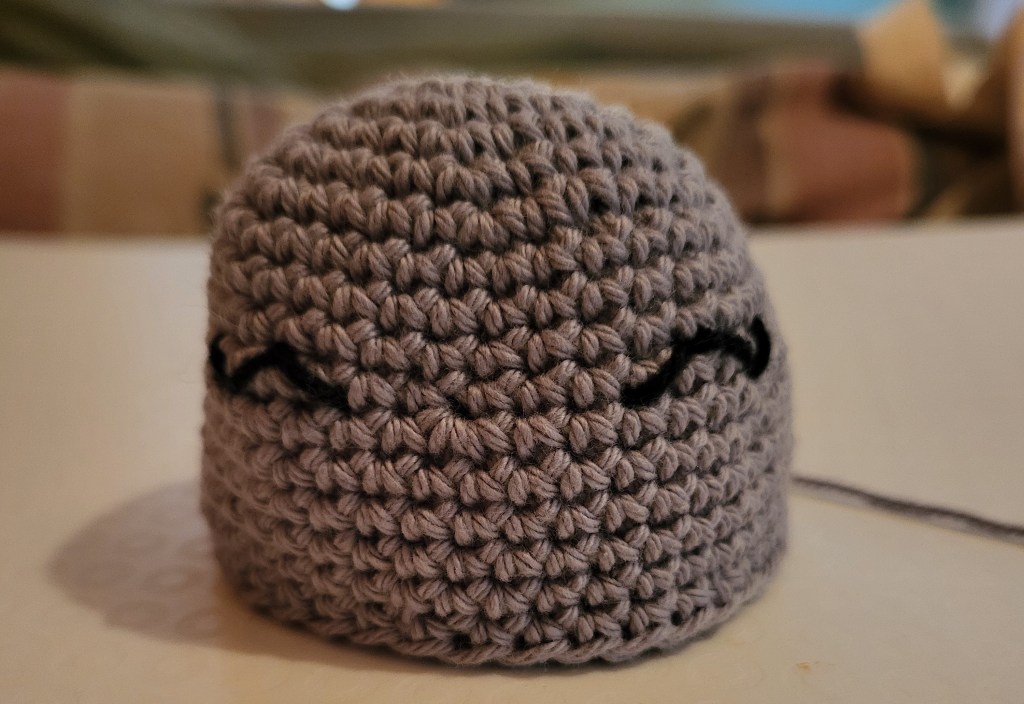
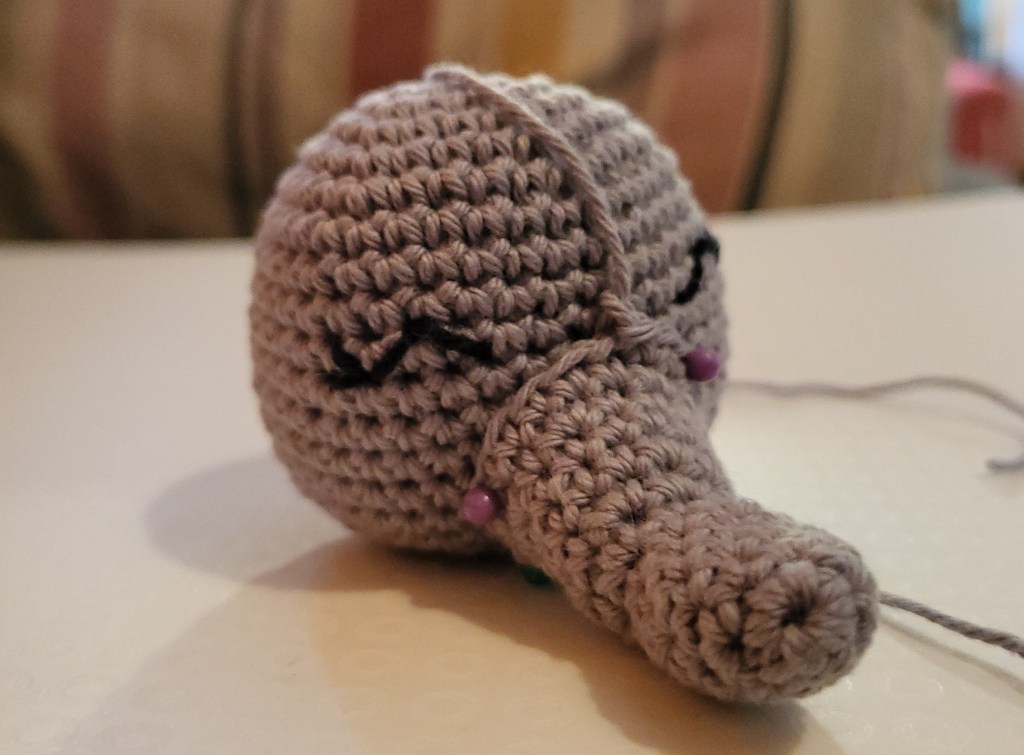
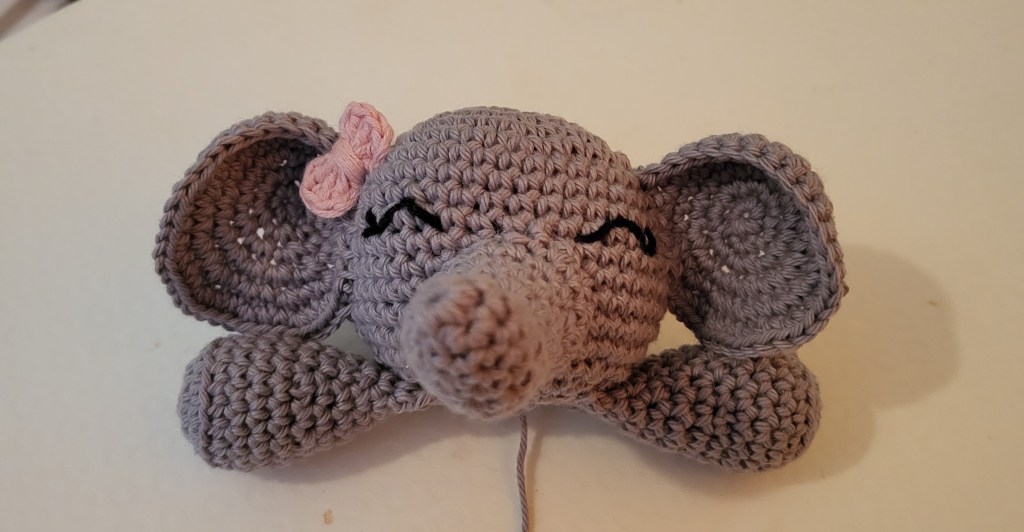
Head
1: 6 sc in magic ring = 6
2: inc x 6 = 12
3: (1 sc, inc) x 6 = 18
4: (2 sc, inc) x 6 = 24
5: (3 sc, inc) x 6 = 30
6: (4 sc, inc) x 6 = 36
7-10: 1 sc in every stitch = 36 (4 rounds)
11: (5 sc, inc) x 6 = 42
12-15: 1 sc in every stitch = 42 (4 rounds)
16: (5 sc, dec) x 6 = 36
Embroider on some eyes between rounds 9-11, with 5 stitches between them. If you want to you can add some eyelashes.
17: (1 sc, dec) x 12 = 24
Start stuffing the head.
18: (2 sc, dec) x 6 = 18
19: (1 sc, dec) x 6 = 12
Stuff the head.
20: 6 x dec
Finish off and sew closed the remaining hole. Use a needle and thread the yarn tail through the last rounds front loops and pull tight so that the hole closes. Save a long yarn tail that you can use to sew the head onto the blanket.

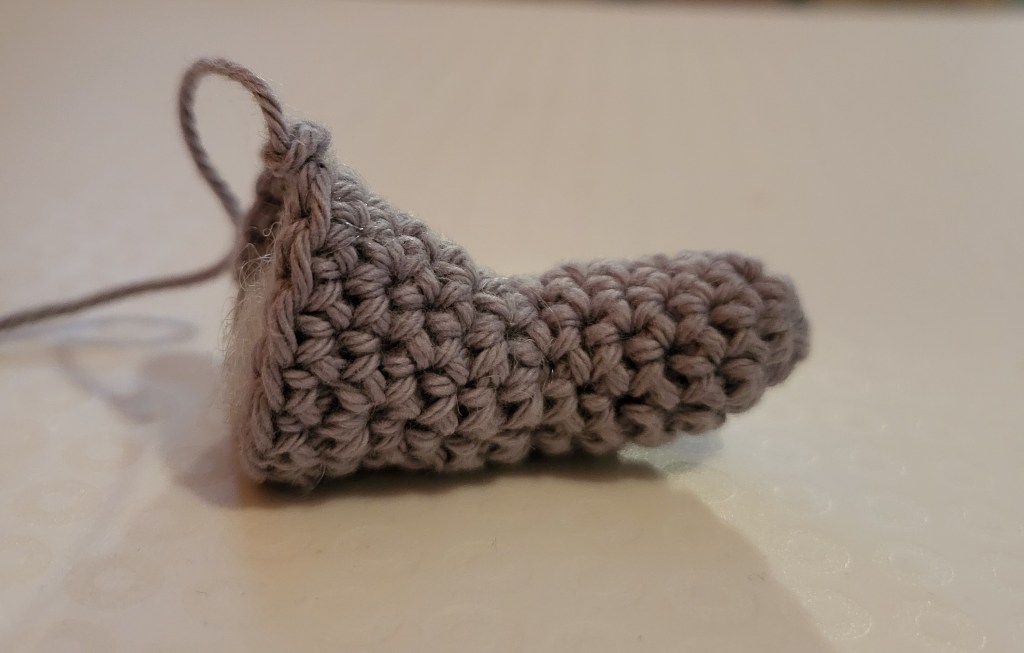
Trunk:
1: 6 sc in a magic ring = 6
2: (1 sc, inc) x 3 = 9
3-7: 1 sc in every stitch = 9 (5 rounds)
Stuff the tip of the trunk.
8: inc x 3, dec x 2, inc x 3 = 12
9: 1 inc, 3 sc, 2 x dec, 3 sc, 1 inc = 12
10-11: 1 sc in every stitch = 12 (2 rounds)
12: (1 sc, inc) x 6 = 18
13: 1 sc in every stitch = 18
Finish off and leave a long yarn tail for assembly.
Stuff the rest of the trunk. The increases and decreases in round 8 and 9 gives the trunk a little bend. The part with the increases is the top part of the trunk.
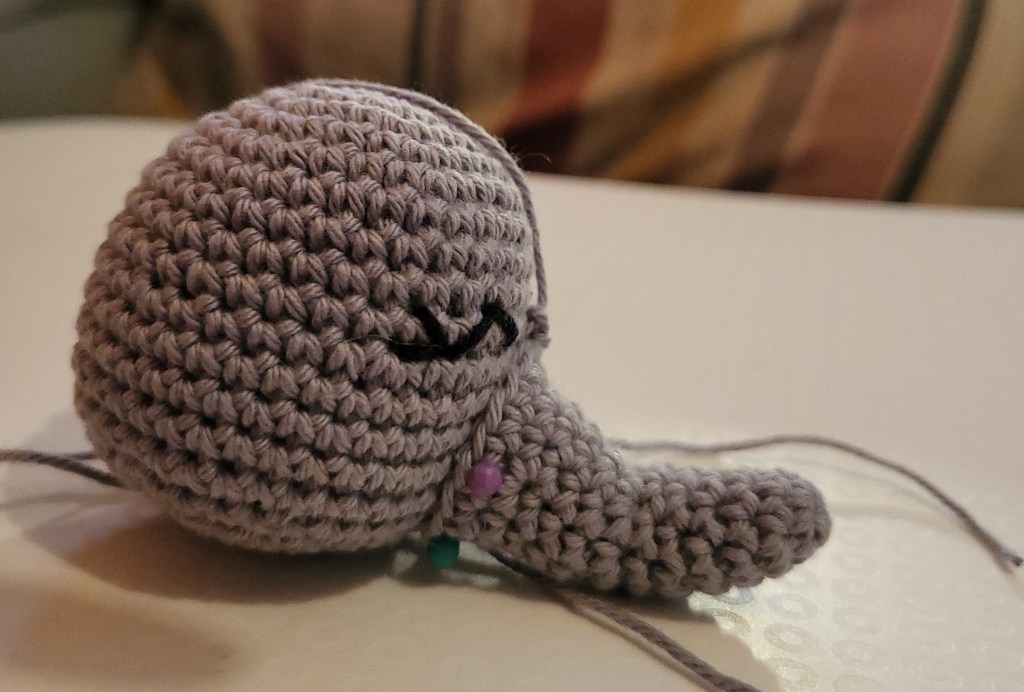
Assembly:
Sew the trunk to the head by placing it between the eyes making sure the top of the trunk is level with the bottom part of the eyes. If you need to stuff the trunk some more you can do so before sewing all the way around.
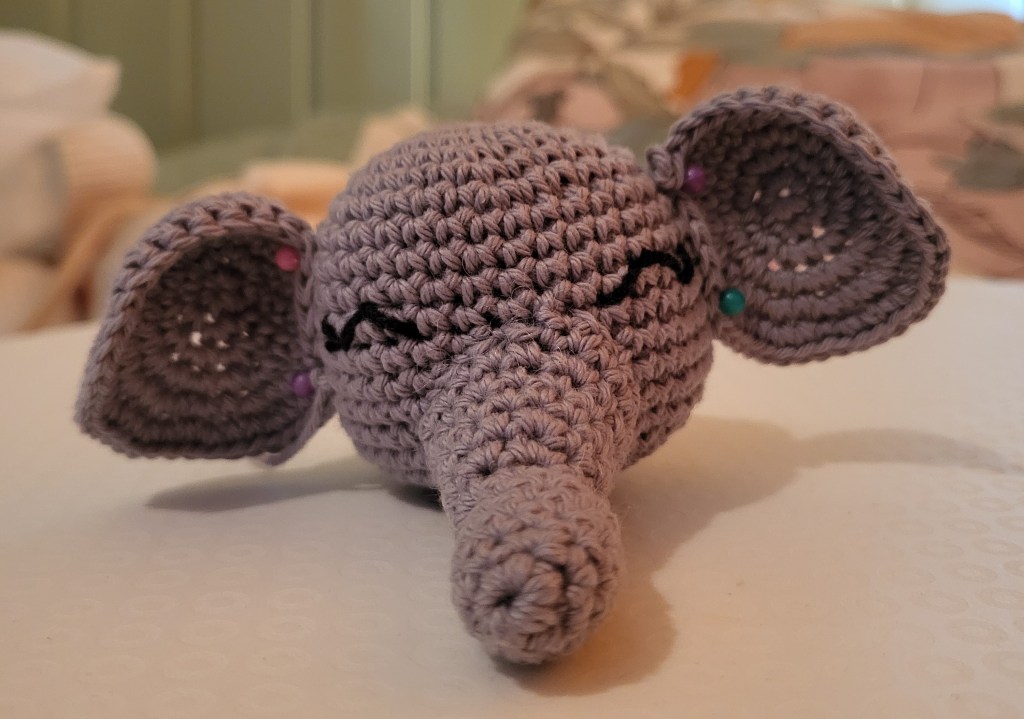
Ears:
Left and right ear is crocheted differently. Make one of each.
Left:
1: 6 sc in magic ring = 6
2: inc x 6 = 12
3: 6 sc, inc x 6 = 18
4: 12 sc, inc x 6 = 24
5: 12 sc, (1 sc, inc) x 6 = 30
6: 12 sc, (2 sc, inc) x 6 = 36
Finish off and leave a long yarn tail for assembly.
Sew in the starting thread as neatly as you can at the back.
Right:
1: 6 sc in magic ring = 6
2: inc x 6 = 12
3: inc x 6, 6 sc = 18
4: inc x 6, 12 sc = 24
5: (1 sc, inc) x 6, 12 sc = 30
6: (2 sc, inc) x 6, 12 sc = 36
Finish off and leave a long yarn tail for assembly.
Sew in the starting thread as neatly as you can at the back.

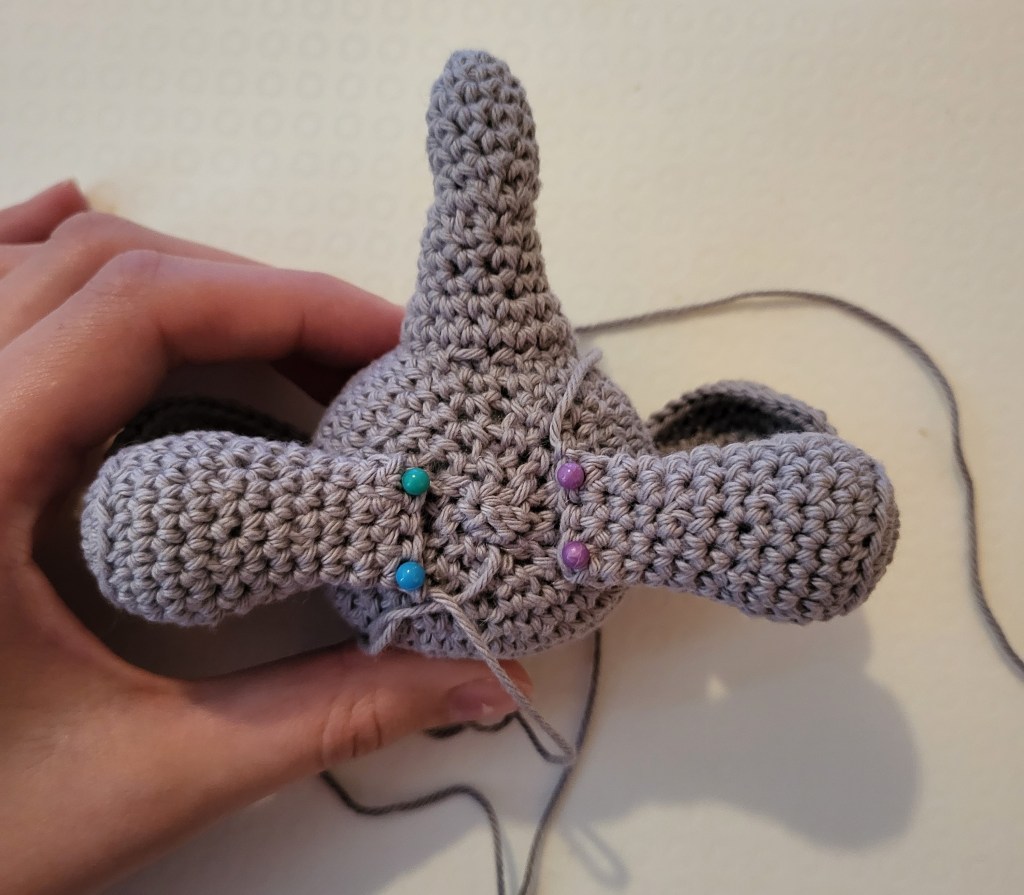
Attaching the ears:
For the right ear you attach it to the head by sewing from the last stitch, starting 2 rounds above the top of the eyes, at the middle of the head. Sew down the side until about 2 rounds below the eye. You can also sew a few extra stitches at the back of the ear if you wish.
For the left ear you start sewing from the last stitch about 2 rounds below the eyes, at the middle fo the head. Sew your way upwards until about 2 rounds above the top of the eyes. You can also sew a few extra stitches at the back of the ear if you wish.
The ears bend a bit inwards against the head and has a little bend at the top.

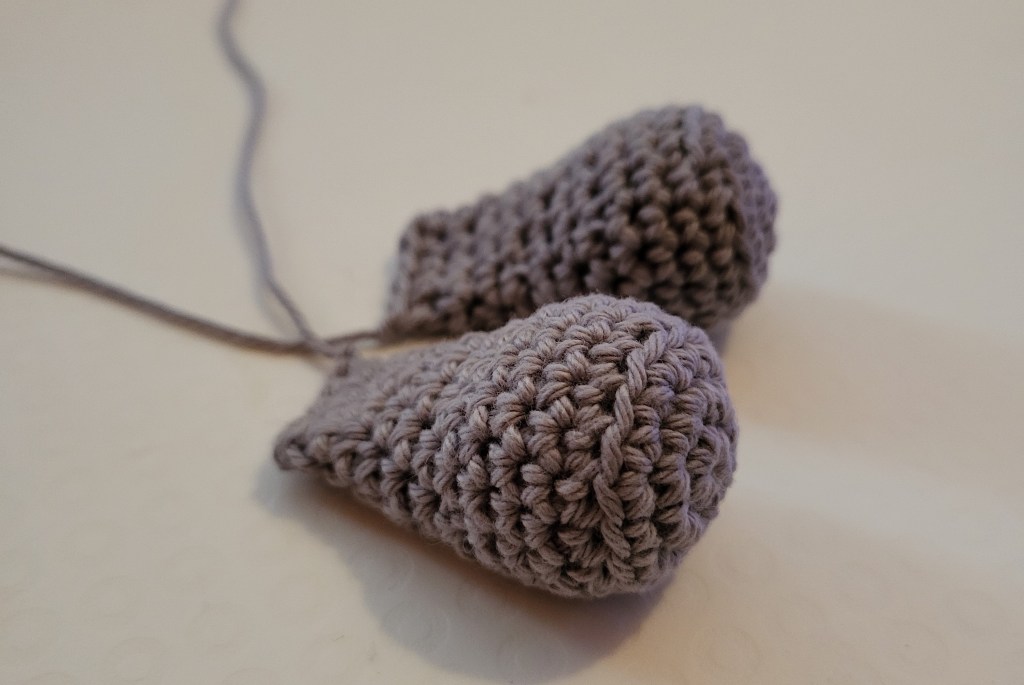
Arms – make 2:
1: 6 sc in magic ring
2: inc x 6 = 12
3: (1 sc, inc) x 6 = 18
4: 1 sc in every stitch in the back loop only = 18
5-7: 1 sc in every stitch = 18 (3 rounds)
8: (1 sc, dec) x 6 = 12
Stuff the tip of the arm.
9-10: 1 sc in every stitch = 12 (2 rounds)
11: (2 sc, dec) x 3 = 9
12-13: 1 sc in every stitch = 9 (2 rounds)
Stuff the rest of the arm, but do not stuff it too much. They will lay flat under the head.
Crochet the opening closed by making 4 sc through one stitch on each side. Save a long yarn tail for assembly.
Bow:
If you want to you can make a little bow. You can either place it under the head as a bow tie, or on their head.
Make these stitches into a magic ring:
2 ch, 3 dc, 2 ch, 1 sl st, 2 ch, 3 dc, 2 ch, 1 sl st.
Close the magic ring and save a long yarn tail for assembly.
Take the yarn tail and twist the thread around the middle of the bow for a few rounds and sew it onto the head under one ear, or below the head for a bow tie look.
Blanket:
You can make whatever blanket you wish. I have made a classic granny square blanket. I’ve used the same blanket as for my Bunny lovey, see pattern here: Bunny lovey
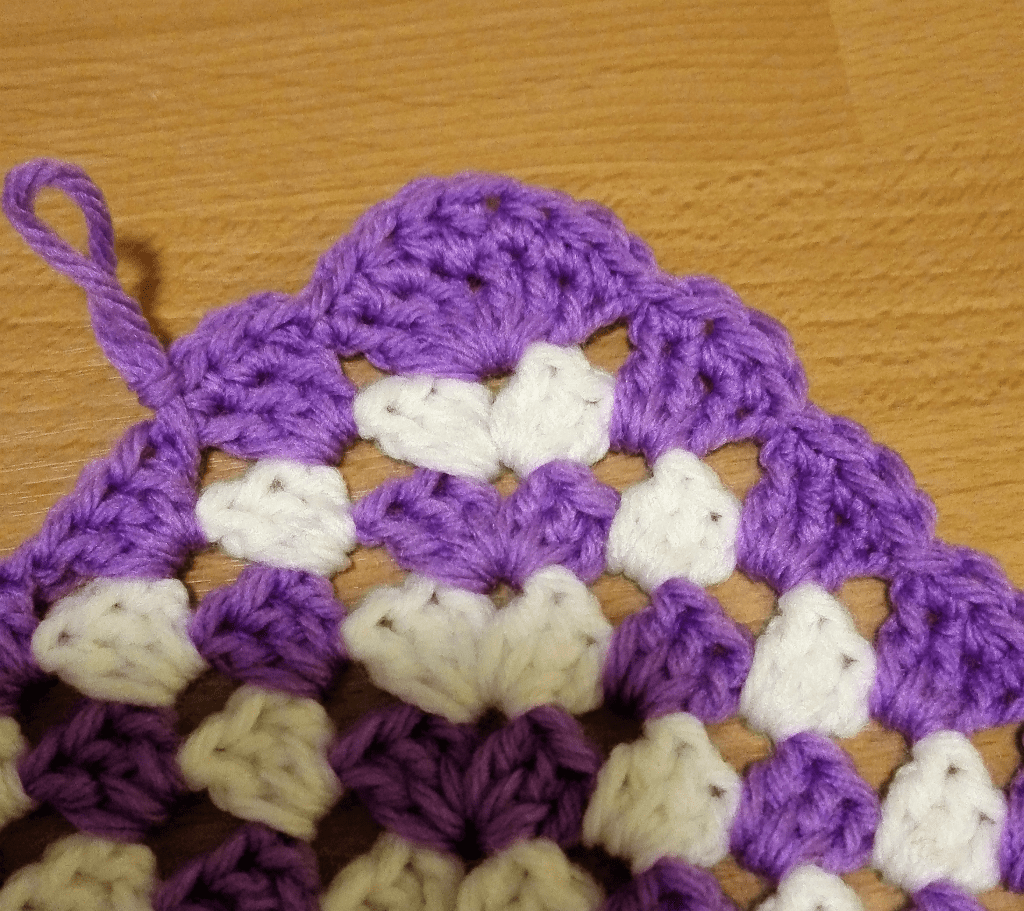
You can choose whatever size you want. The wavy edge works either way.
Assembly:
Start by sewing on the arms below the head. Attach them at the middle under the head, see pictures below.
Continue by sewing the head and arms onto the blanket. Sew them on to the first round of the blanket. Choose the direction you want the head to face. I have sewn it on so that it turns towards the pointy end. Make sure to sew it on well so that the baby can tug at it. Fasten all ends.
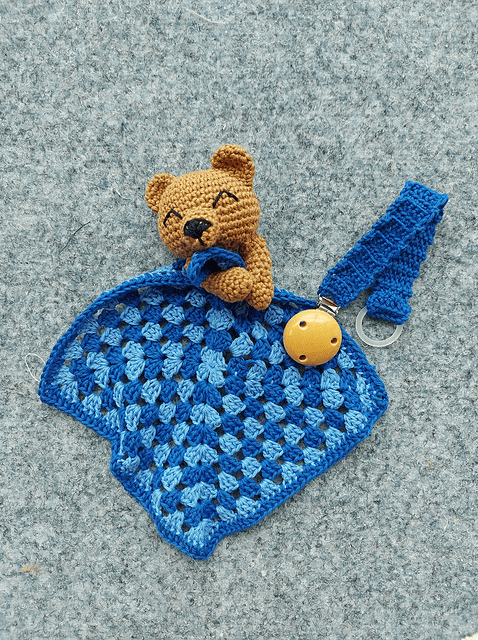
You can also attach the blanket in a way that looks like the elephant holds the blanket, like I’ve done with this bear. The blanket does not need to be as big if you do it this way. I only crocheted 9 rounds here + the edge.
And then your Bear lovey is finished!
I would love to see your creations. Share it with me at Instagram by tagging me @katrineklarer or #katrineklarer. 😊
Thank you for checking out my pattern! If you have any questions please leave a comment or contact me by email: katrineklarer@outlook.com
You can also share it as a project on Ravelry! Click here to add it as a project or to see other projects made with this pattern.
You are welcome to sell finished products made by following my patterns. But I would love it if you referenced me as the designer. Do not share my pattern as your own, but you can of course link to my page on your blog etc.
Oppdag mer fra Katrine Klarer
Abonner for å få de siste innleggene sendt til din e-post.

En kommentar om “Elephant lovey”