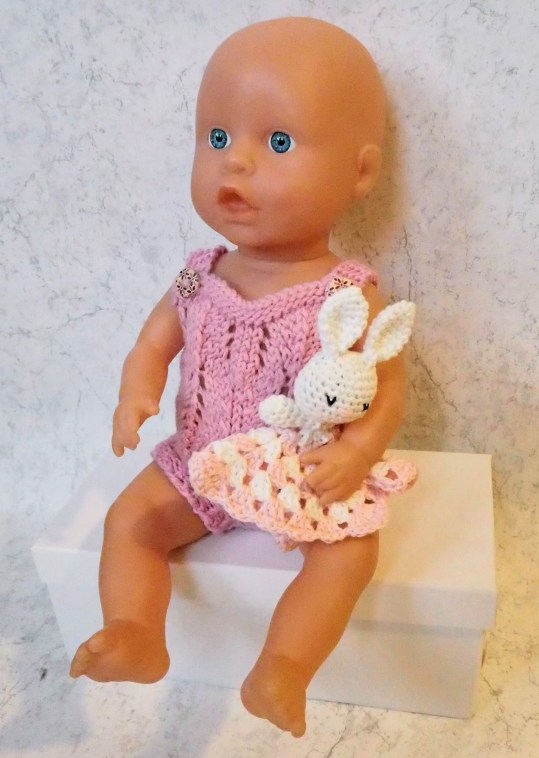
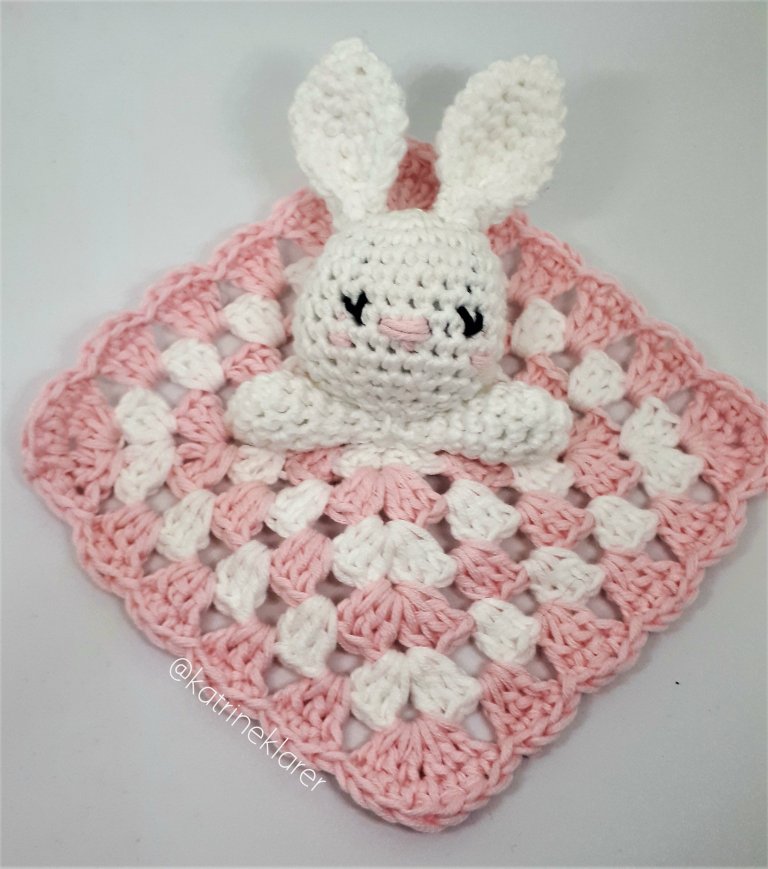
Based on my original bunny lovey pattern I have customized it to be smaller so that the doll can have one too! Just imagine how cute when the little one you once made the lovey for gets a doll with a matching lovey. 🙂
I have customized the pattern for the head, ears and arms so that it’s a bit smaller than the original. I also recommend using thin yarn and a 2 mm/2,5 mm (B) hook. If you use thicker yarn and hook the lovey gets bigger. If you have the doll on hand test it out to see what size you feel is best.
The blanket pattern is exactly the same, just less rounds. As I wrote in the main pattern you may use any kind of blanket with the lovey, just adjust the size accordingly.
Copyright:
This is a pattern made by me, Katrine Hansen Tveito. You may sell finished products made by this pattern. If you do this I would like to be credited as the maker of the pattern either by my name, or my accounts on either Etsy, Ravelry or Instagram. Please do not translate without asking or share this pattern on a different site. If you want to share the pattern use the option to link back to my page instead.
What you need:
You can use safety eyes or embroider the eyes and details on. I have embroidered.
Use a 2 mm or 2, 5 mm hook (B) and thin fingering yarn. I used cotton yarn, Mandarin petit.
You also need a little stuffing for the head and arms.
Scissors, pins and sewing needle.
Stitches used in this pattern – US terms:
magic ring
sc – single crochet
inc – increase – make 2 sc in the same stitch
dec – decrease – crochet 2 sc together – use invisible decrease if you know how
(1 sc, inc) x 6 = this means you will repeat the stiches in the parenthesis 6 times.
The head, ears and arms are worked in the round, so you just keep crocheting without joining each round (like a spiral).
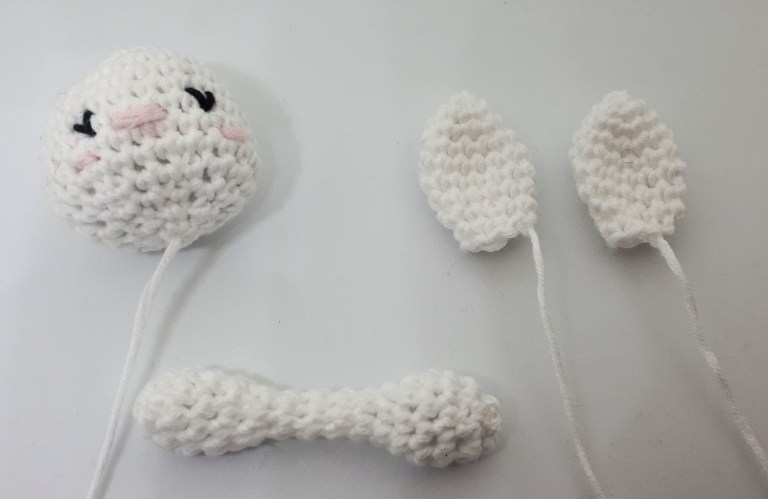
Ears – make 2:
1: 3 sc in magic ring = 3
2: inc x 3 = 6
3: (1 sc, inc) x 3 = 9
4: (2 sc, inc) x 3 = 12
5-7: 1 sc in every stitch = 12 (3 rounds)
8: (2 sc, dec) x 3 = 9
9: 1 sc in every round = 9
Finish off and save a long tail for assembly. Sew the sides at the bottom of the ear together a bit to make it bent.

Below are pictures from the original pattern showing you how to sew the sides together at the bottom of the ear.


Head:
1: 6 sc i magic ring = 6
2: inc x 6 = 12
3: (1 sc, inc) x 6 = 18
4: (2 sc, inc) x6 = 24
5-10: 1 sc in every stitch = 24 (6 rounds)
If you want to attach safety eyes you can do this now. About between round 7 and 8. If you’re going to embroider on it’s face you can also do that now. I prefer to do it before I stuff, so that I can secure the ends on the inside.
11: (2 sc, dec) x 6 = 18
Add stuffing to the head.
12: (1 sc, dec) x 6 = 12
13: dec x 6 = 6
Finish off by sewing shut the remaining hole. Save a long tail for assembly.
Arms:
The arms are made in one long piece.
1: 6 sc i magic ring = 6
2: (1 sc, inc) x 3 = 9
3-5: 1 sc in every stitch = 9 (3 rounds)
Add a little stuffing.
6: (1 sc, dec) x 3 = 6
7-11: 1 sc in every stitch = 6 (5 rounds)
12: (1 sc, inc) x 3 = 9
13-15: 1 sc in every stitch = 9 (3 rounds)
Add a little stuffing.
16: (1 sc, dec) x 3 = 6
Finish off by sewing shut the remaining hole. Hide the tail.
Blanket:
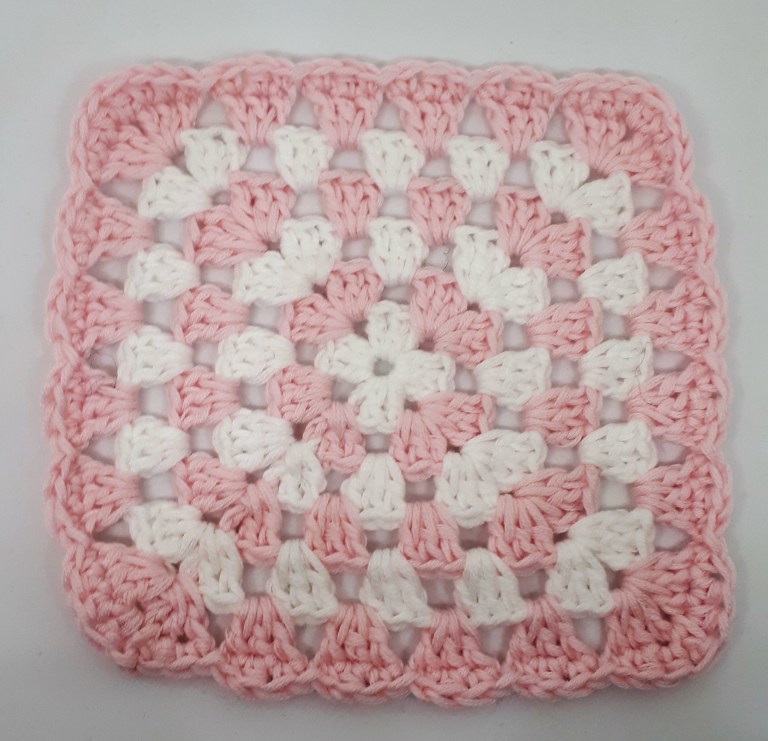
Make a blanket out of granny squares or a different technique. See my original lovey pattern for instructions here. Or a star blanket instructions by The Crafty Mama Bear here.
I made the blanket as a granny square with 6 rounds and the edge that I made in my original pattern. Instructions here.
Assembly:
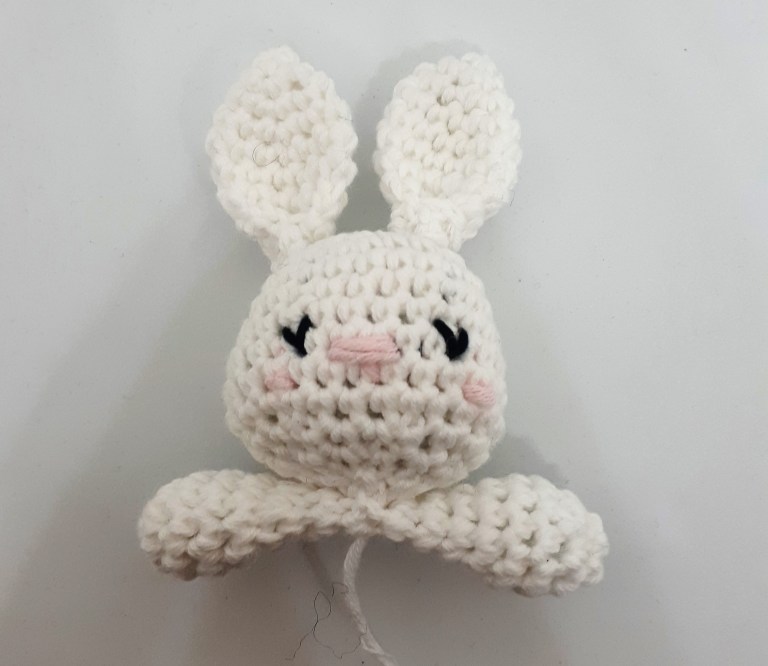
Sew the ears to the head. At the middle of the head in round 3. If you want to you can also skip the step by sewing them a bit together in the bottom and sew them on flat to get hanging ears.
Sew the arms to the head with the remaining tail from the head, and do not fasten off yet. Use the rest of the tail to sew the whole thing to the blanket. Sew it on to the first round of the granny square. I sewed mine on so that the face is facing the point of the blanket.
And then your little lovey for the dollie is finished! I would love to see your creations. Share it with me at Instagram by tagging me @katrineklarer or #katrineklarer. 🙂 You can also share it as a project on Ravelry! 🙂

If you have any questions or feedback, don’t hestitate to contact me.
Oppdag mer fra Katrine Klarer
Abonner for å få de siste innleggene sendt til din e-post.

The Lovey for the doll is the cutest little thing I seen in like forever. With 2 baby great-nieces I had to pin it so I can make it for them. Once I finish the project that I NEED to get finished now, and IF ITS soon, like by this Christmas, then I have 3 more little great-nieces that might be interested in getting them too.
LikerLiker
Thank you for your lovely comment. If you made it I hope your nieces liked it. 🙂
LikerLiker