In October 2017 I had a Mystery Cal where people got a pattern piece by piece without knowing what they made. This is the complete pattern. The result of the Mystery Cal was a horse/unicorn. 🙂
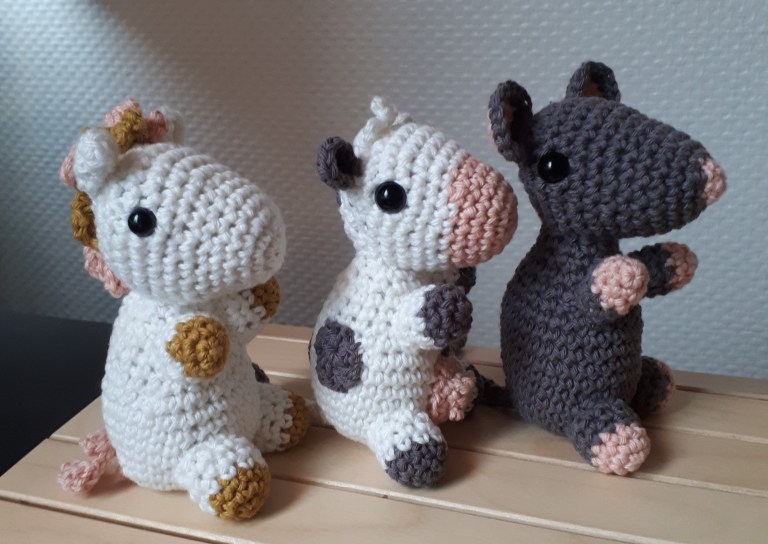
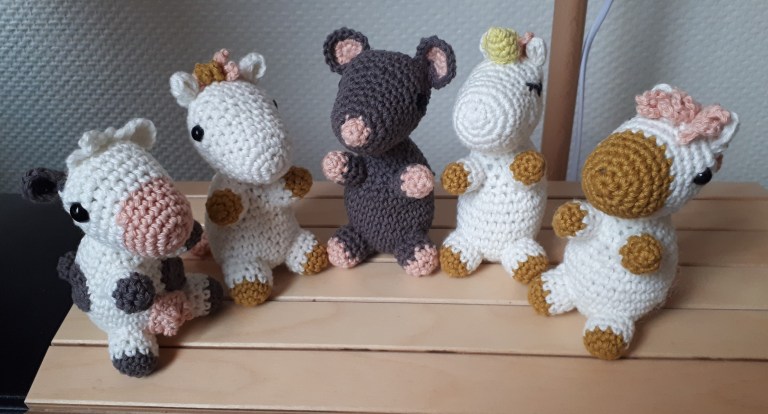
For those you were a part of the Cal you can now see that I have added some additional designs. When I was designing both me and my bf thought it kinda looked like a mouse before it got it ears, and under the Cal I trolled the people a little by now showing them how to fold and sew the ears until assembly, so they stayed as round ears until then. So there were people that thougth the mysteryanimal was a mouse. But I also thought the it kinda looked like a cow too.. So, I just had to make some additional deisngs.
Soo, I have added some new details and variations so that you can make it into a mouse or cow! 😀 The base pattern is pretty much the same, and then you can make some additional details. Because of that I have put all of it in one pattern, but I hope that it’s not too confusing.
You can find the pattern for the reindeer here.


Stitches and techniques: US terms
Magic ring
St: stitch
Ch: chain
Sl st: slip stitch
Sc: single crochet
Inc: increase – 2 sc in 1 st
Dec: decrease – use invisible decrease if you can – tutorial at the bottom too
(1 sc, inc) x 6 = means that you do 1 sc, 1 increase and repeats this for 6 times total. Use a stitch marker to know where the round starts, and a counter to count your rounds.
Colorchanges.
Hdc: half double crochet
Dc: double crochet
Tr: treble crochet
– these are used for the cow’s spots only.
You will need:
Cotton yarn in fingering weight, and a hook in 2mm-2,5mm.
Stuffing, needle, pins, scissor, stitchmarker, safetyeyes (ca. 8 mm) or embroidery thread.
Base color: Horse and cow is white, mouse is grey.
Detail color: Horse is brown, mouse is pink, cow has pink for its snout, and grey for its legs/arms.
Body:
In base color:
1: 6 sc in magic ring
2: inc x 6 = 12
3: (1 sc, inc) x 6 = 18
4: (2 sc, inc) x 6 = 24
5: (3 sc, inc) x 6 = 30
6-12: 1 sc in every st = 30 (7 rounds)
13: (3 sc, dec) x 6 = 24
14: (2 sc, dec) x 6 = 18
15-16: 1 sc in every st = 18 (2 rounds)
17: (1 sc, dec) x 6 = 12
18: 1 sc in every st = 12
Finish off and leave a long tail that you will use for assembly later. Fill the piece with stuffing, and leave the opening hole as is.

Head:
Start with base color or detailcolor:
1: 6 sc in magic ring = 6
1,5: Mouse only: 1 sc in every st = 6 – switch to main color in next round
2: inc x 6 = 12
3: (1 sc, inc) x 6 = 18
4-7: 1 sc in every st = 18 (4 rounds) – Horse and Cow: if you chose to make them with 2 colors, change to base color in round 7.
8: (2 sc, inc) x 6 = 24
9: 1 sc in every st = 24
10: (3 sc, inc) x 6 = 30
11-12: 1 sc in every st = 30 (2 rounds)
13: (3 sc, dec) x 6 = 24
14: (2 sc, dec) x 6 = 18
Attach eyes between rounds 10 and 11. Fold the head in two, and find a spot a little over halfway, and stick the eye all the way thrugh both layers. Where the eye comes out at the other side will guide to where you should place the second eye. Or you could embroider on some eyes after you’ve stuffed the head.


15: (1 sc, dec) x 6 = 12 – stuff the head
16: dec x 6 = 6


Finish off and sew the remaning hole closed.
Assembly:
Attach the head on to the body so that the back of the head is in line with the back of the body, and sew the body on to round 8 of the head in front.

Legs – make 2:
Start with detail color:
1: 5 sc in magic ring
2: inc x 5 = 10
3: 1 sc in every st = 10
Switch to base color:
4-6: 1 sc in every st = 10 (3 rounds)
Finish off and leave a long tail that you will use for assembly later. Fill with stuffing.

Arms – make 2:
Start with detail color:
1: 4 sc in magic ring = 4
2: inc x 4 = 8
3: 1 sc in every st = 8
Switch to base color:
4-6: 1 sc in every st = 8 (3 rounds)
Finish off and leave a long tail for assembly next part. Fill with stuffing.

Assembly:
Attach the legs between rounds 4 and 9 on the body, with 2-3 sts apart. Place them so that they are in line with the eyes.
Attach the arms between round 13 and 16 on the body, with ca. 2 sts apart.


Ears – make 2:
Use base color for the horse and cow, for the mouse you start with the detail color:
1: 6 sc in magic ring = 6
2: inc x 6 = 12
3: Mouse only: switch to base color – (1 sc, inc) x 6 = 18


Finish off after round 2 for the horse and cow, and after round 3 for the mouse, and save a long tail for assembly.
Assembly:
Horse and cow:
Fold them in two, and sew them together at the bottom about 2 sts up.
Mouse:
Fold them in two, and sew them together at the bottom, but not as much as the other ears, just about 1 st up.


Horse:
Attach ears on round 14 of the head. Attach them with pins like this, so that they stand up right, and sew them on.


Cow:
Attach ears on round 14 of the head. Attach them with pins like this, so that they stand out to the side, just above the eyes, and sew them on.


Mouse:
Attach ears on round 14 of the head. Attach them with pins like this, and sew them on.

Ok, so this is all the parts that are pretty much similar on all of the animals. Next we’re going to make individual parts.
Mouse:
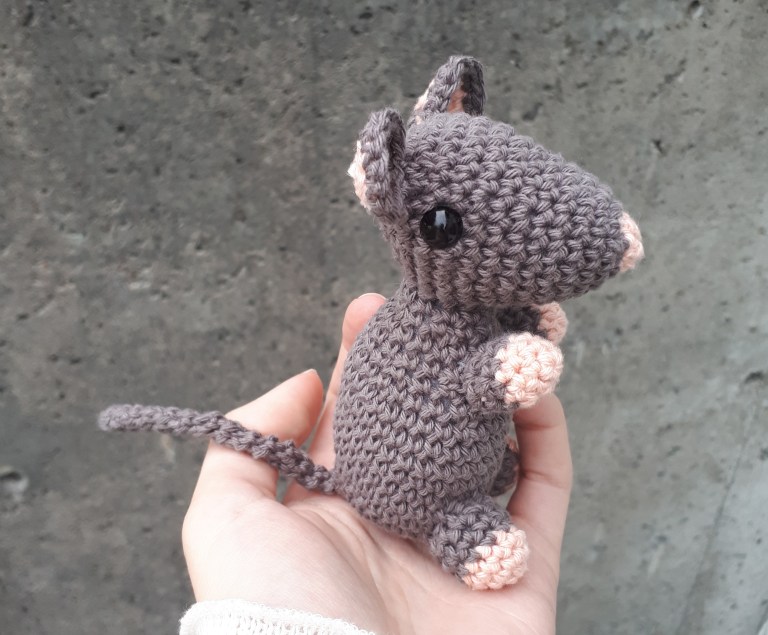
Tail:
In base color:
1: 4 sc in magic ring = 4
2-15: 1 sc in every st = 4 (14 rounds)
4: inc x 4 = 8
Fasten off and save a long tail for sewing the tail on to the body.
Sew it on to the butt between rond 5 and 6 with the last round going against its butt.


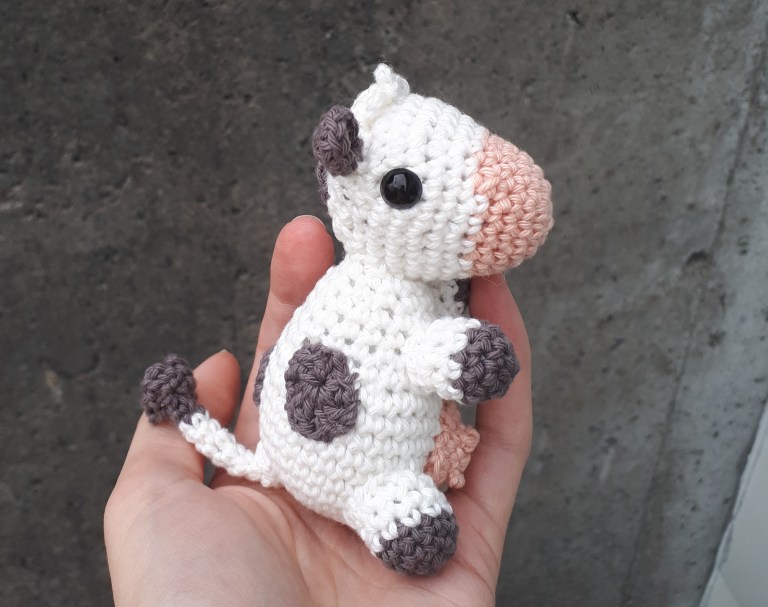
Cow:
Bangs:
In base color:
1: chain 4
2: Start in the 2nd ch from the hook with (1 sc, 5 chains, 1 sl st), (1 sc, 7 chains, 1 sl st) in the next st, (1 sc, 5 chains, 1 sl st) in the last stitch.
Finish off and leave a long tail for sewing. Sew o to the top of the head, on round 12 or 13, with the straight edge at the back, and the loops towards its forehead.


Tail:
In detail color:
1: 4 sc in magic ring = 4
2: Crochet in front loops only: (1 sc, 5 chains, sl st in the same stitch) x 4


3: turn your work over and crochet in the back loops from last round. 1 sc in every st = 4

Switch to base color:
4-9: 1 sc in every st = 4
10: inc x 4 = 8
Finish off and leave a long tail to sew it on to the body with. Sew it on between round 5 and 6.

Udder:
In pink:
1: 6sc in magic ring = 6
2: inc x 6 = 12
3: 1 sc in every st = 12


")
Finish off and leave a long tail for sewing it on with. Embroider on 4 french knots to the middle. Sew it on so that you sew almost all the way around, but stop for a bit and fill it with some stuffing, and then you sew it completly shut.


Spots:
In detail color:
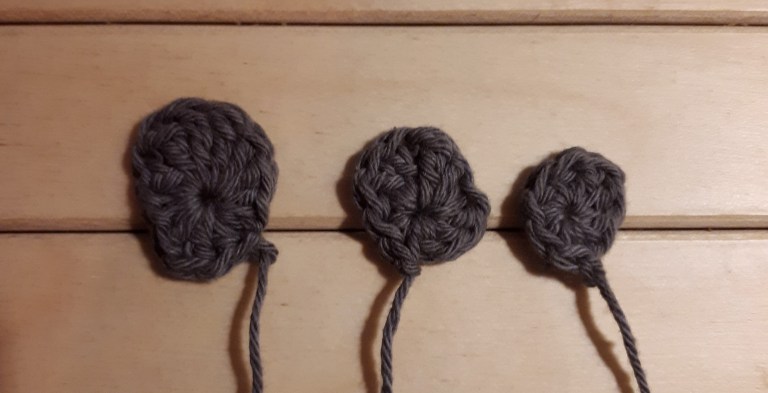
Big:
Magic ring with: sc, hdc, dc, dc, tr, tr, tr, dc, sc, sc, dc, dc, hdc – finish it of with a sl st in the first st and save a long tail to sew it on to the body with.
Medium:
Magic ring with: sc, hdc, dc, sc, dc, tr, dc, dc, hdc, sc – finish it of with a sl st in the first st and save a long tail to sew it on to the body with.
Small:
Magic ring with: sc, hdc, dc, dc, hdc, hdc, sc, sc – finish it of with a sl st in the first st and save a long tail to sew it on to the body with.
Make as many as you want and place them around at the body, and sew them on. 🙂 Or leave the cow bare, if you’d prefer that. 🙂

Horse:


Mane – make 2 or 3.
Chain 21
Start in the 2nd chain from the hook with *(1 sc, 5 chains, 1 sl st), (1 sc, 7 chains, 1 sl st) in the next st, (1 sc, 5 chains, 1 sl st) in the next st, 2 sl st’s* repeat from *-* 3 times more (4 total).


Finish off and leave a long tail for sewing them on with.

Assembly:
Here you can do a little as you want. In my designing phase I really wanted to make hair that could be braided or twirled together, in two colors. But I have also made a version with straight hair.


Twirled/braided version: (click on the images above to get them larger).
Start by pinning down both pices to the top of the head, about where the front side of the ears are. Then you take that pink piece and put it over the other one/the brown one, by placing it in that 2 sl stitch space, and pin it down. This is why I had to adjust the Crownpicot stitch, so that I could do this. Keep going by taking that brown piece and placing it over that pink one in its 2 sl stitch space, and pin it down. Continue like this all the way down. This is a bit tricky to explain, but I hope it will be easier to understand when you sit with it in your hands. Just try around a bit, to get the look you want. 🙂


Straight version:
This is much easier. Just take 3 pieces and pin them down at the top and bottom of the neck and sew into place. As you can see these run a little longer down his face, since they are not twirled. I did try to make twirled hair with longer pieces, but I couldn’t get it t work out nicely. But if you want to try just add 5 more chains at the start to make room for one more picot, and so on.


Tail – make 2:
1: Chain 11
2: Start in the 2nd ch from the hook with *(1 sc, 5 chains, 1 sl st), (1 sc, 7 chains, 1 sl st) in the next st, (1 sc, 5 chains, 1 sl st) in the next st, 2 sl st’s* repeat from *-* 1 more time (2 total).
Finish off and leave a long tail to sew them on with.


Take 2 pieces (or more) and sew them on to its butt, about between round 5 and 6. You can choose to do it in a single color, or multiple. I sewed them on so that they are right next to each other.
Unicorn:
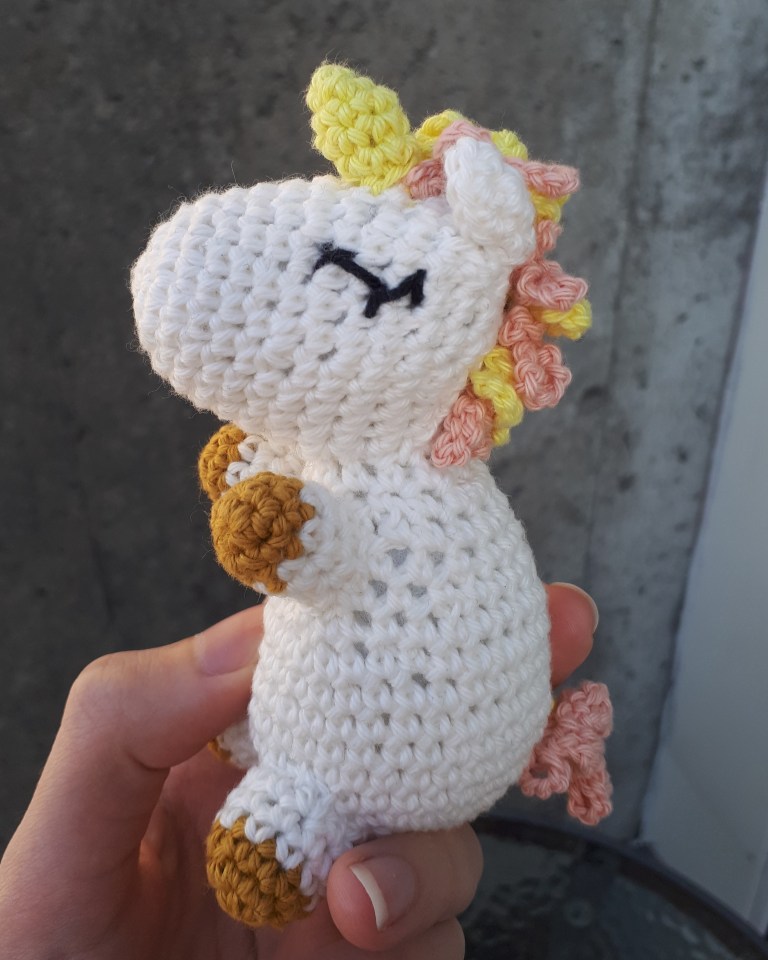
Horn:
In yellow:
1: magic ring with 3 sc = 3
2: inc x 3 = 6
3-5: 1 sc in every st = 6
Finish off and save a long tail to sew it on with. Stuff a little.
Sew it on to the forehead of the horse, and voila, you got yourself a unicorn!


Thanks for making us!
Share your photo of us on IG with the tag #katrineklarer 😀
You may sell items made with this pattern (private sale, not coorporate), but do reference me if you put it up for sale in etsy or instagram and so on.
You can not republish the text and/or photos on your own blog etc, without referencing me, or asking me first. But you may share it as much as you like, as long as you link back here to me or my instagram.
– Katrineklarer
Add it as a project on Ravelry if you want. 🙂 Click the button under here.

Oppdag mer fra Katrine Klarer
Abonner for å få de siste innleggene sendt til din e-post.

This is a very sweet crochet project. Thank you for sharing your pattern. I look forward to making several of these animals.
Thanks,
Cheryl McTavish
Manitoba, Canada
LikerLiker
Thank you! I hope you will like your new little friends. 🙂
LikerLiker